In this blog post, we will learn the basics of Ethereum. We will discover the currency governing the Ethereum network, learn how to use Wallets, create transactions, and execute basic Smart Contracts.
Ether
Ether is the currency that governs the Ethereum network, also known as ETH. The smallest unit of ether is called wei. 1 ether = 1 * (10 ** 18) wei
| Value(in wei) | Exponent | Common Name | SI name |
| 1 | 1 | wei | Wei |
| 1,000 | 10**3 | Babbage | Kilowei/femtoether |
| 1,000,000 | 10**6 | Lovelace | Megawei/picoether |
| 1,000,000,000 | 10**9 | Shannon | Gigawei/nanoether |
| 1,000,000,000,000 | 10**12 | Szabo | Microether/micro |
| 1,000,000,000,000,000 | 10**15 | Finney | Milliether/milli |
| 1,000,000,000,000,000,000 | 10**18 | Ether | Ether |
| 1,000,000,000,000,000,000,000 | 10**21 | Grand | Kiloether |
| 1,000,000,000,000,000,000,000,000 | 10**24 | Megaether |
Ethereum Wallet: Basics
An Ethereum Wallet is a piece of software that allows users to interact with Ethereum by creating and broadcasting transactions throughout the network. The Wallet also stores your private keys which are required to access your account or funds.
There are various wallets to get anyone started:
MetaMask
MetaMask is a browser extension wallet that allows users to connect to a wide range of Ethereum nodes and test networks. It is by far the most popular Ethereum Wallet.
MyEtherWallet (MEW)
MyEtherWallet is a web-based wallet and an alternative to Metamask
Responsibilities To Consider When Using A Wallet
- Never store your private key in plain text or digitally
- Do Not store your passwords in digital documents or online drive. the safest way is using a password manager or plain old pen and paper.
- Always transfer small amounts as a test and wit for transaction confirmation before sending significant amount of funds
Getting Started With MetaMask: Ethereum Basics
To truly master the basics of Ethereum, you will have to master MetaMask first.
Go to https://chrome.google.com/webstore/category/extensions, search for MetaMask and click the “Add To Chrome” button to install it.
Once it’s installed you should see the fox icon on the browser’s toolbar. Click on it and create a new password.
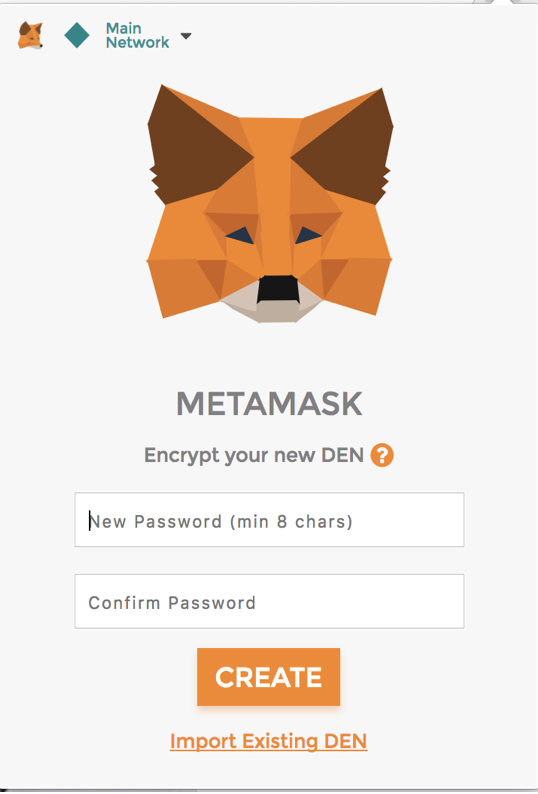
After the password is set, Metamask will create a new wallet and nnemonic backup of 12 words that a user can use to regain access to their funds in case they lost/forget their password.
After confirming that your nnemonic is stored safely, you are redirected to your account screen
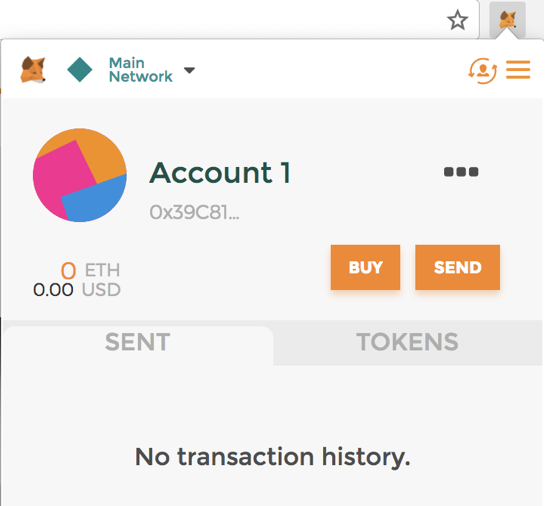
By default, MetaMask will attempt to connect you to the Ethereum mainnet. MetaMask supports a wide variety of mainnets and testnets that you can switch to and from. The main testnets for Ethereum are:
- Ropsten
- Kovan
- Rinkeby
- Localhost:8545
- Custom RPC
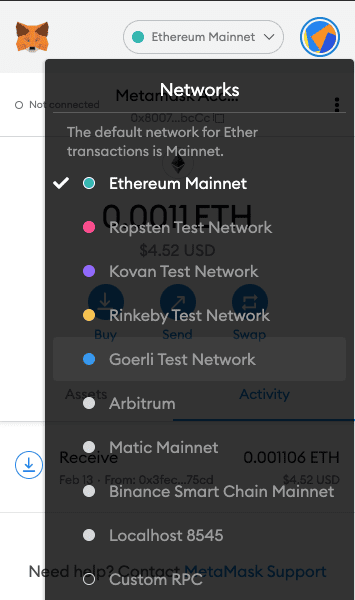
Funding Your Account
To get your account funded, you need some tests ether.
- First make sure you are on the Ropsten Test Network
- Copy your Account address. It should look like this: 0x2d2498cca8161a4e0403af9a6ce6fe50b56d8d9c
- Head over to https://faucet.ropsten.be
- Paste your address inside the input box
- Click “Send Me Test Ether“
Go back to your Ethereum wallet, and you should see the fund there. Depending on network congestion, it might take up to 5mins for the funds to become available and you should see a transaction in the Activity tab
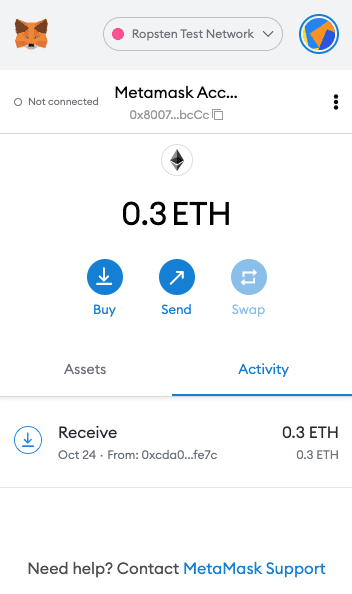
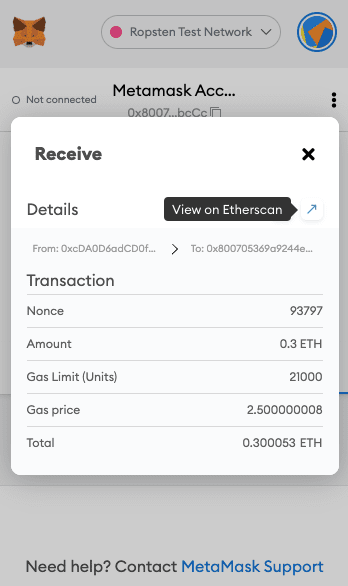
By clicking on the transaction, you will get more details, such as the none, the amount that was sent, the gas limit and gas price, and a link to explore the transaction in detail on Etherscan block explorer.
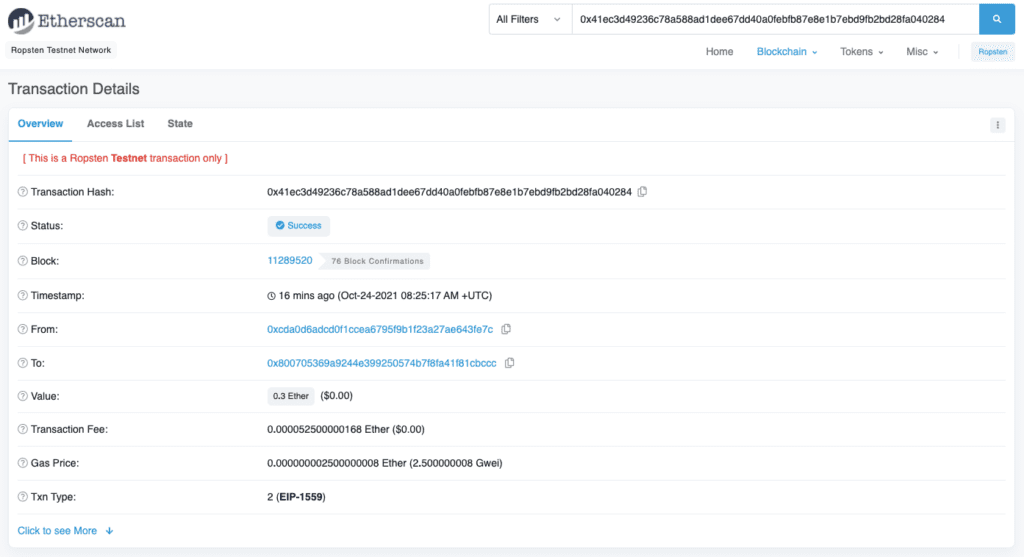
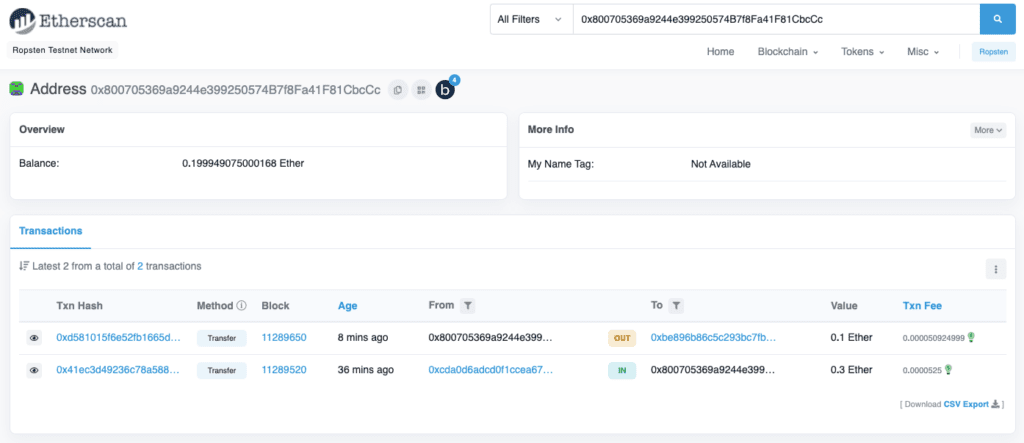
Valid transactions are recorded and stored on the blockchain. Etherscan is a block explorer which allows us to see more details on our transaction on-chain
Sending Funds From MetaMask
To send funds from Metamask to another account,
- Make sure that you have the receiver’s address handy
- On your MetaMask homescreen, click on “Send”
- Enter the receiver’s address in the input and the amount to send; then click next
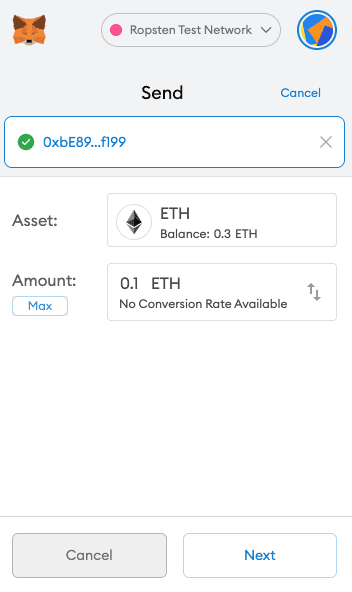
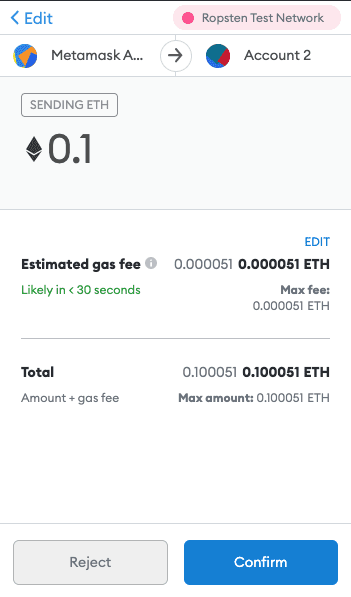
- Metamask will display a confirmation screen, with the details of the transaction. Click “Confirm”
Exploring Ethereum Transaction History of An Address: Basics
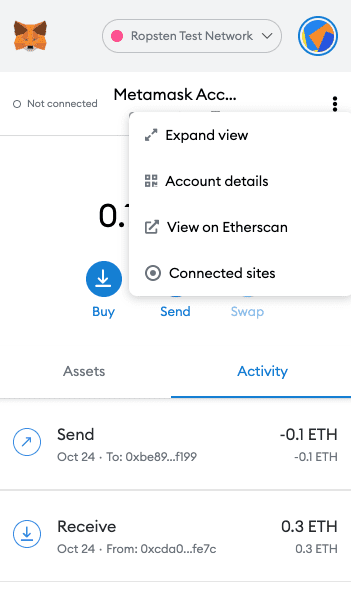
If you would like to explore all the past transactions from a specific MetaMask account, click on your account and select “View On Etherscan”
The Etherscan block explorer will display all past transactions from this MetaMask account
In Conclusion
In this blog post, we learned how to set up a MetaMask account and fund it using some fake ether from the Ropsten Test Network. We also learned how to send and receive funds from and to our MetaMask account. Finally, we learned how to explore transaction history on-chain, using a block explorer such as EtherScan.
MetaMask is the most popular Ethereum Wallet out there and to develop and deploy decentralized applications, understanding Basics tools such as MetaMask is crucial. It takes a little while to get accustomed to the tool, but once you get the gist of it, you will be on your way to building the next generation of DApps.
