Search Engine Optimization (SEO) is crucial for increasing your website’s visibility on search engines like Google. For WordPress users, the Yoast SEO plugin offers a user-friendly way to optimize your pages and posts. In this comprehensive 2024 guide, we’ll walk you through each step to effectively optimize a webpage using Yoast SEO, helping you improve your search rankings and drive more organic traffic to your site.
Want to create a website, read our guide on How to Build a Website with WordPress.
What is Yoast SEO?
Yoast SEO is one of the most popular and powerful WordPress plugins designed to enhance your website’s SEO. Whether you’re a beginner or an experienced webmaster, Yoast provides actionable insights into content optimization, helping you achieve better search engine rankings. The plugin covers a wide range of SEO aspects, from meta tags and keywords to technical elements like XML sitemaps and schema markup.
Read our article on Why Local SEO is Important for Small Businesses.
Step 1: Install and Activate Yoast SEO
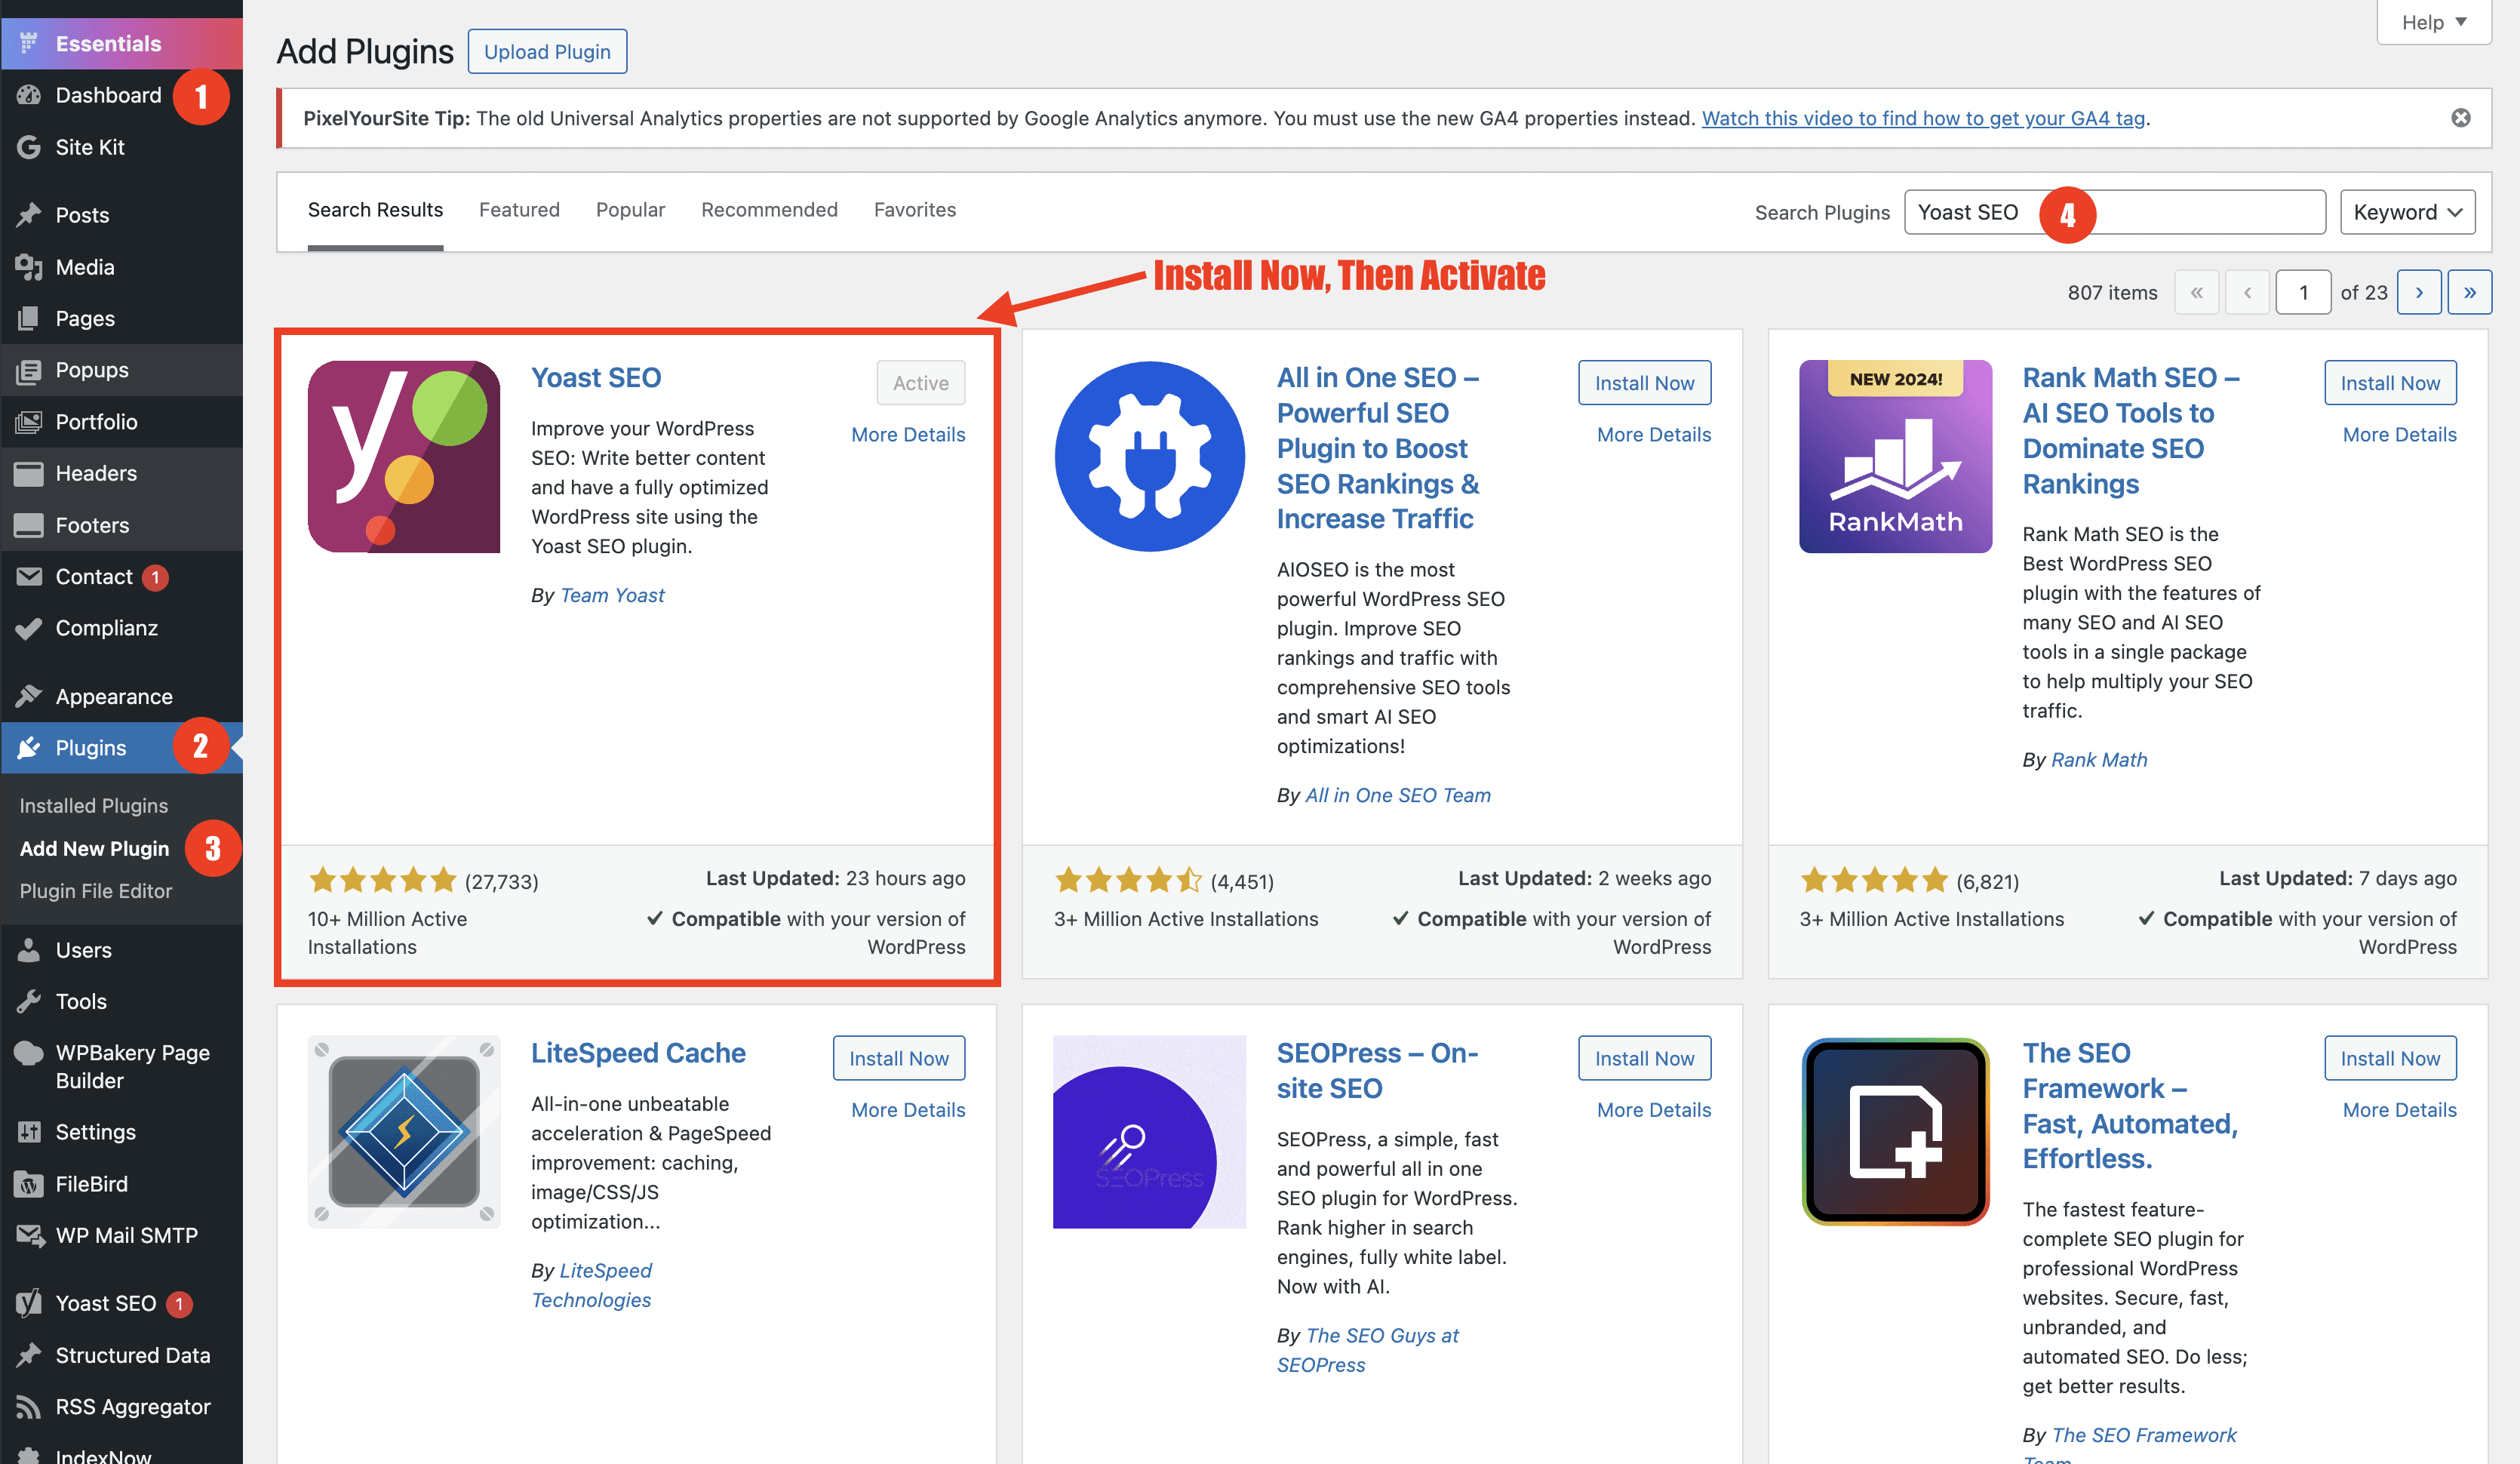
Getting started with Yoast SEO is simple:
- Log in to your WordPress dashboard.
- Navigate to Plugins > Add New.
- In the search bar, type “Yoast SEO” and press Enter.
- Find the Yoast SEO plugin and click Install Now.
- Once installed, click Activate.
Step 2: Configure General Settings
After activation, it’s important to configure the basic settings to ensure optimal performance:
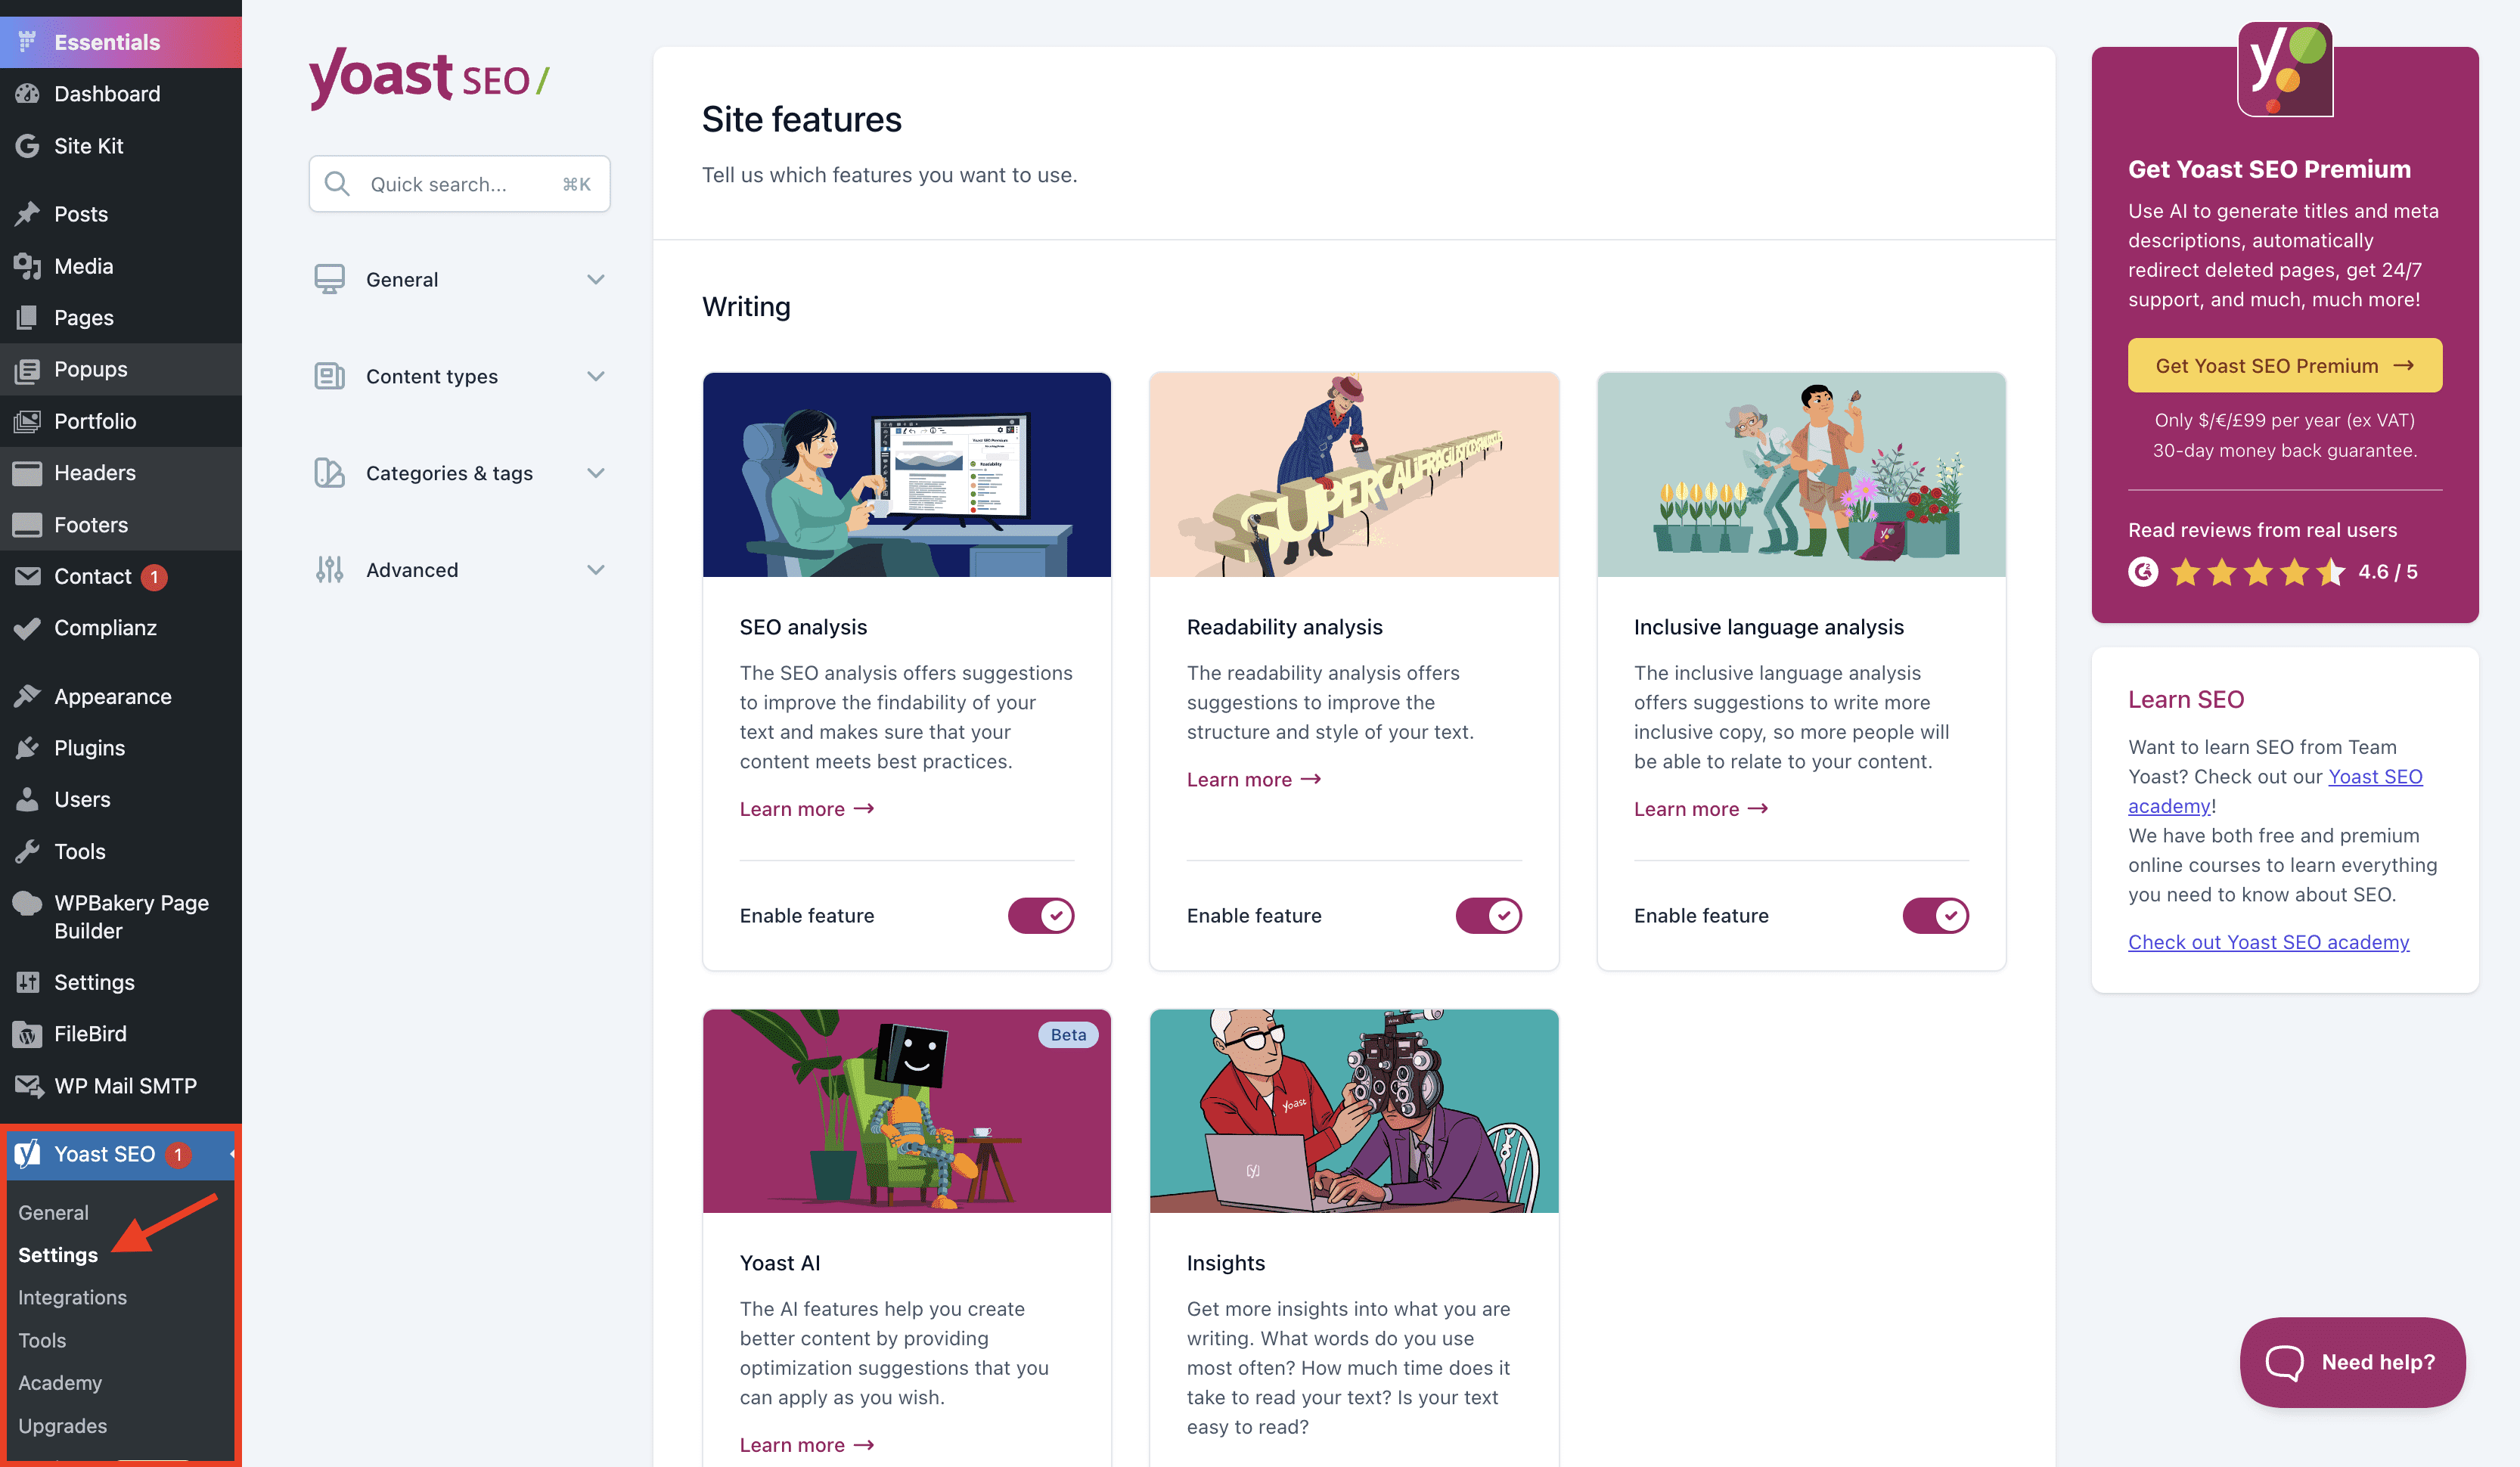
- Go to Yoast SEO > Settings in your WordPress dashboard.
- Under the General > Site Features tab, make sure the following features are enabled:
-
- SEO analysis: The SEO analysis offers suggestions to improve the findability of your text and makes sure that your content meets best practices.
- Readability analysis: The readability analysis offers suggestions to improve the structure and style of your text.
- Inclusive language analysis: The inclusive language analysis offers suggestions to write more inclusive copy, so more people will be able to relate to your content.
- Insights: Get more insights into what you are writing. What words do you use most often? How much time does it take to read your text? Is your text easy to read?
- Cornerstone content: Mark and filter your cornerstone content to make sure your most important articles get the attention they deserve. To help you write excellent copy, we’ll assess your text more strictly.
- Text link counter: Count the number of internal links from and to your posts to improve your site structure.
- Open Graph data: Allows Facebook and other social media to display a preview with images and a text excerpt when a link to your site is shared. Keep this feature enabled to optimize your site for social media.,
- X card data: Allows for X to display a preview with images and a text excerpt when a link to your site is shared.
- Admin bar menu: The Yoast icon in the top admin bar provides quick access to third-party tools for analyzing pages and makes it easy to see if you have new notifications.
- REST API endpoint: This Yoast SEO REST API endpoint gives you all the metadata you need for a specific URL. This will make it very easy for headless WordPress sites to use Yoast SEO for all their SEO meta output.
- Slack sharing: This adds an author byline and reading time estimate to the article’s snippet when shared on Slack.
- XML sitemaps: Enable the Yoast SEO XML sitemaps. A sitemap is a file that lists a website’s essential pages to make sure search engines can find and crawl them.
4. Under the General > Site Basics tab, make sure to enter the website name and a tagline.
5. Under the General > Site Connections tab, you can verify your site with different tools like Google Search Console, Bing Webmaster Tools, or Yandex Webmaster Tools. This will add a verification meta tag to your homepage. You can find instructions on how to verify your site for each platform by following the link in the description.
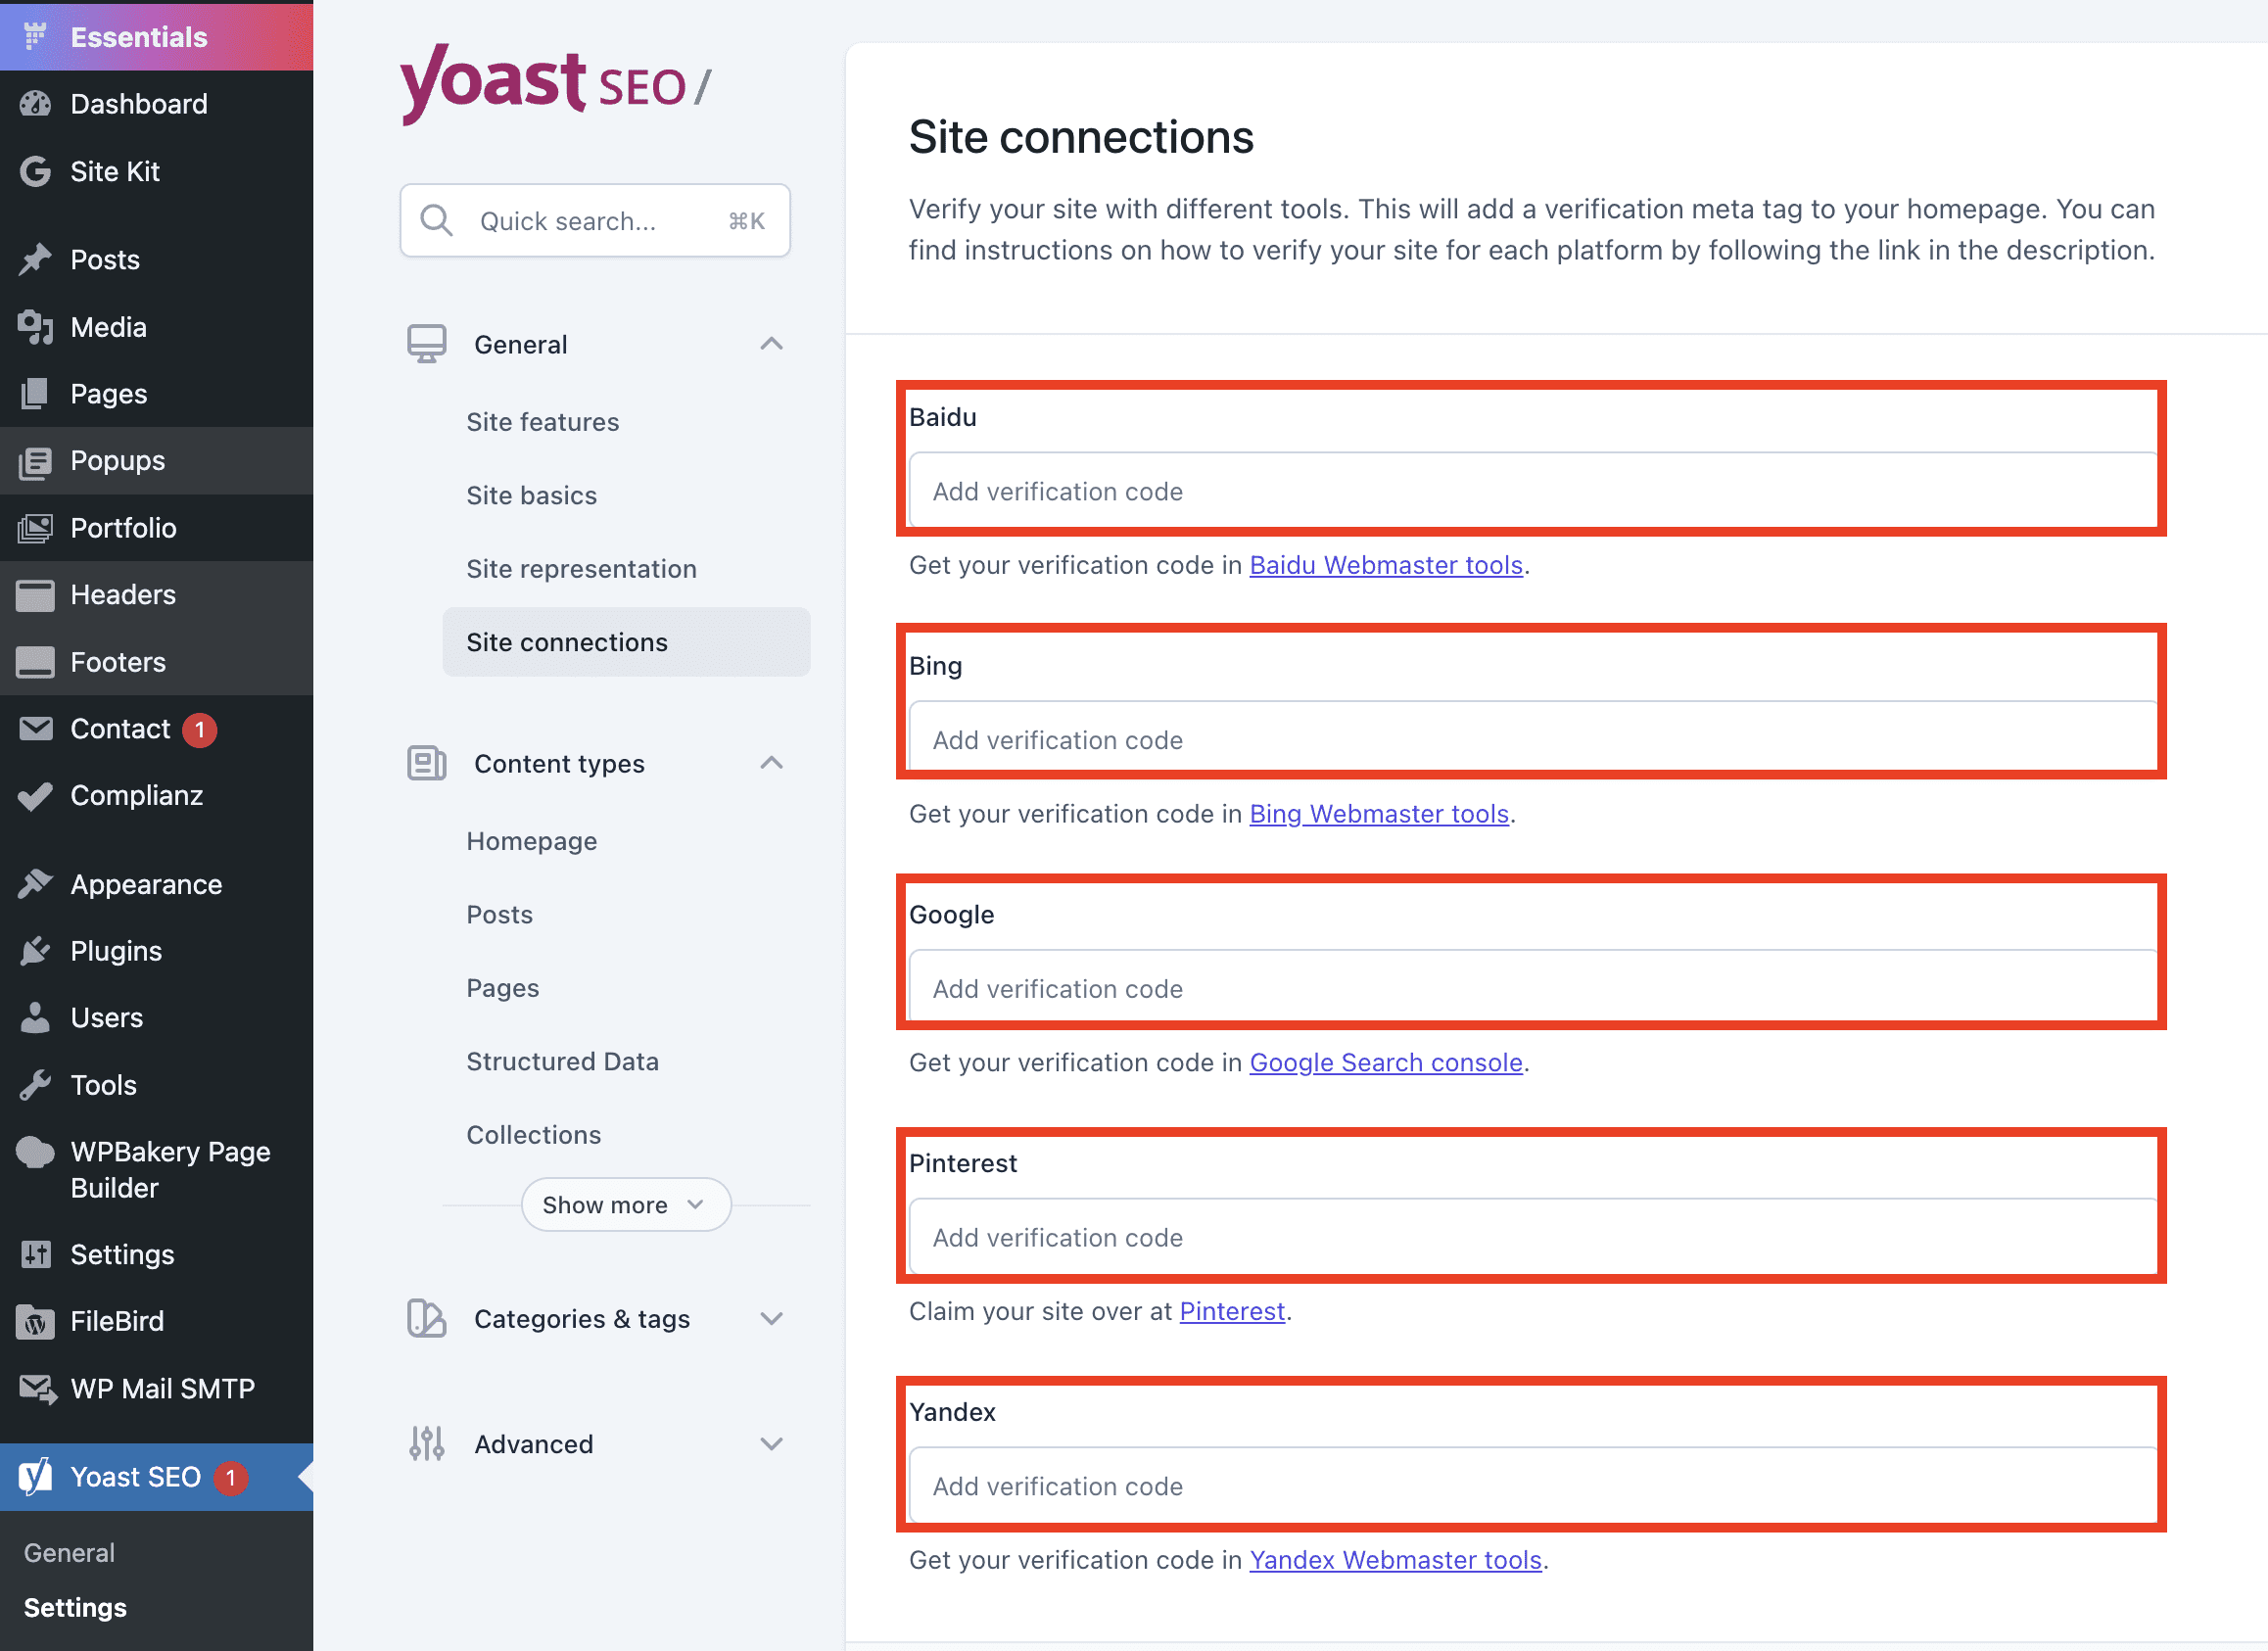
Understanding how to effectively use webmaster tools can significantly enhance your SEO strategy.
Read About Ultimate Guide to Chrome Bookmarklets.
Step 3: Optimize Individual Pages and Posts
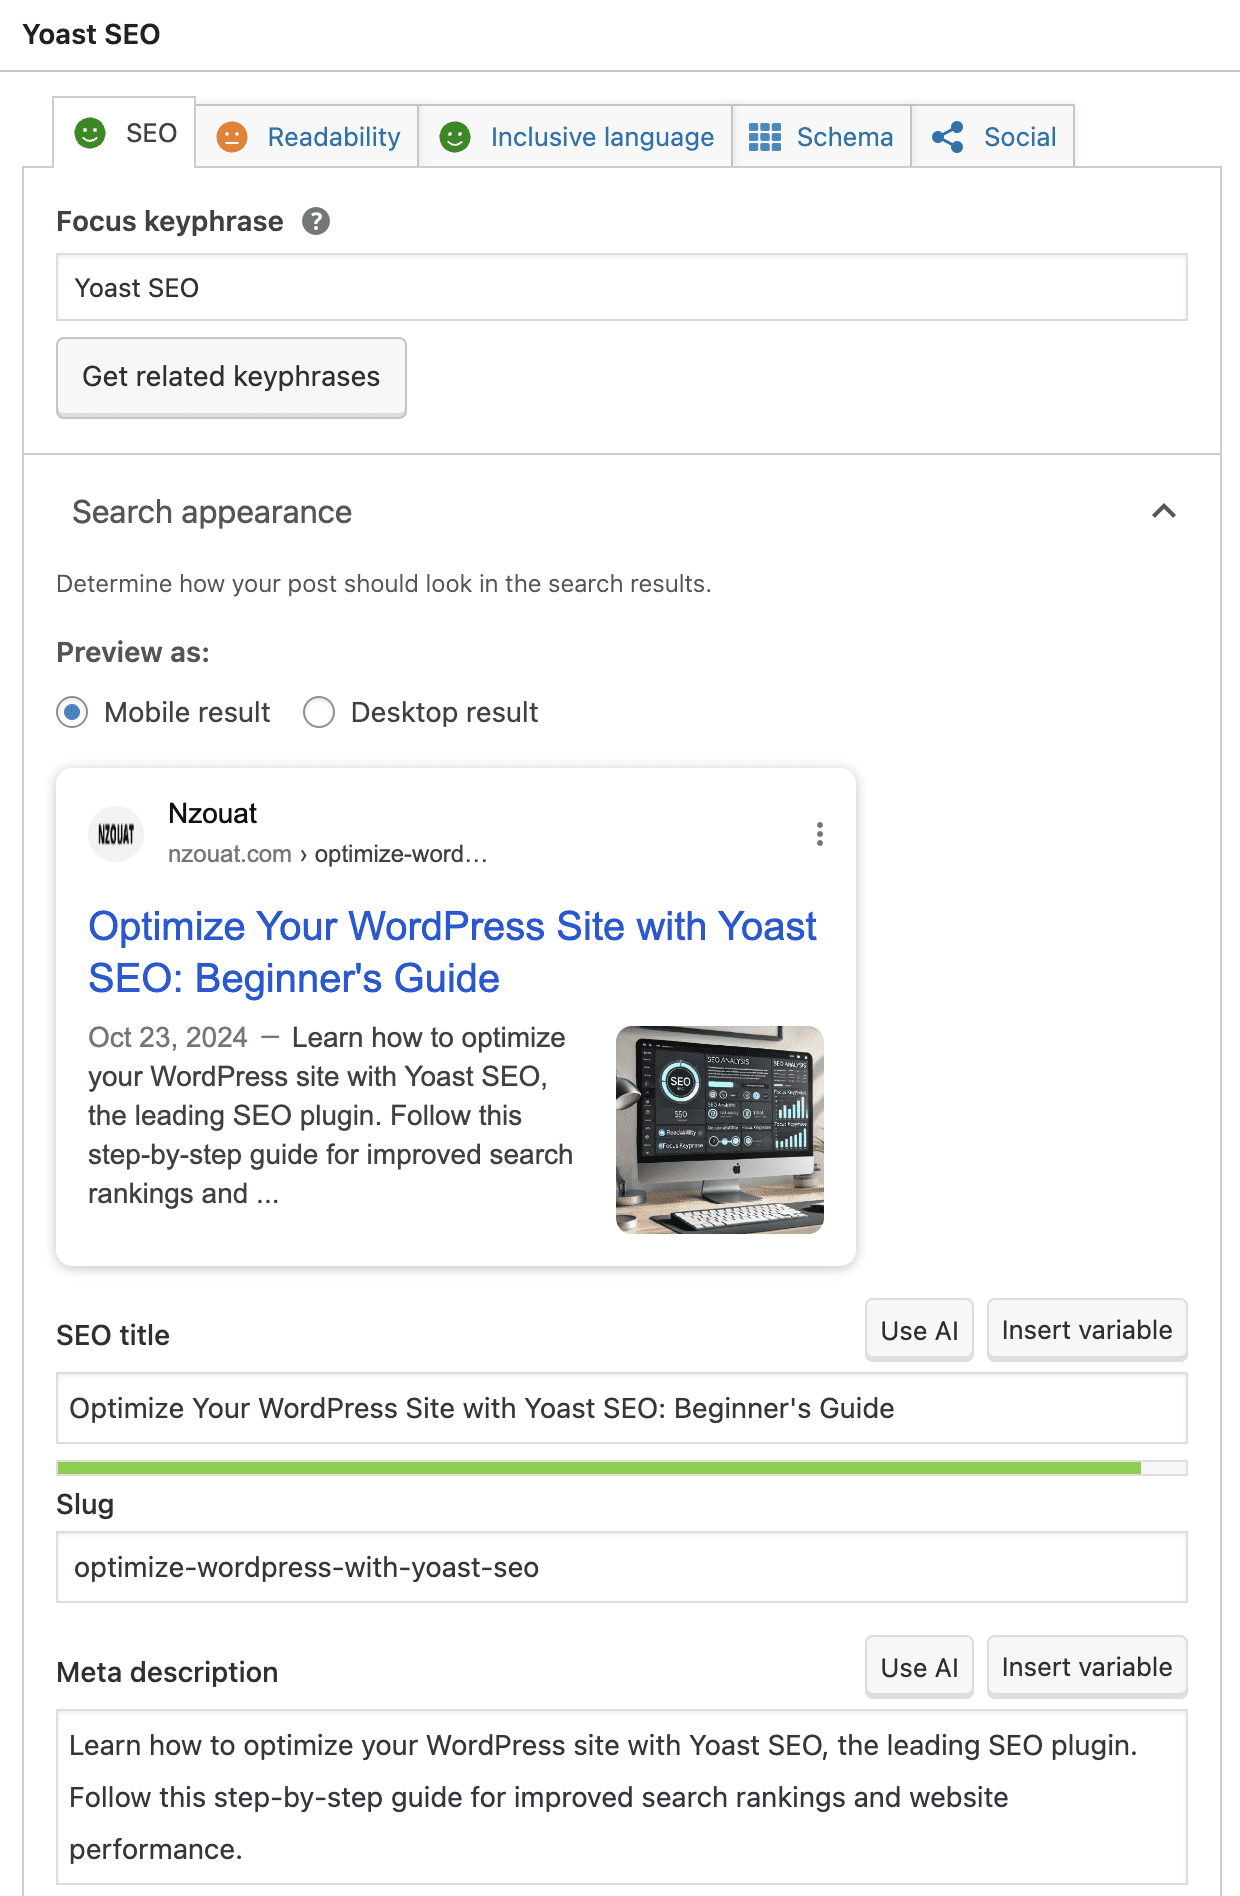
When creating or editing a post or page in WordPress, scroll down to the Yoast SEO meta box to begin optimizing.
Focus Keyphrase
Selecting the right focus keyphrase is essential for SEO success. This should be the primary keyword or phrase you want the page to rank for.
- Enter your focus keyphrase in the Focus Keyphrase field within the Yoast SEO meta box.
- Yoast will analyze how effectively your content utilizes this keyphrase and provide suggestions for improvement.
Check out our article on Hacks to Boost Your Digital Marketing with Google Trends.
Step 4: SEO and Readability Analysis
Yoast SEO uses a color-coded system (red, orange, and green) to evaluate your page’s SEO and readability. Aim for green results, which indicate good optimization.
SEO Recommendations:
- Ensure your focus keyphrase appears in key areas:
- Post title
- Meta description
- URL (slug)
- Throughout the content, especially in the first paragraph and headings
- Maintain a healthy keyphrase density without overstuffing.
- Use synonyms and related keywords to enhance content richness.
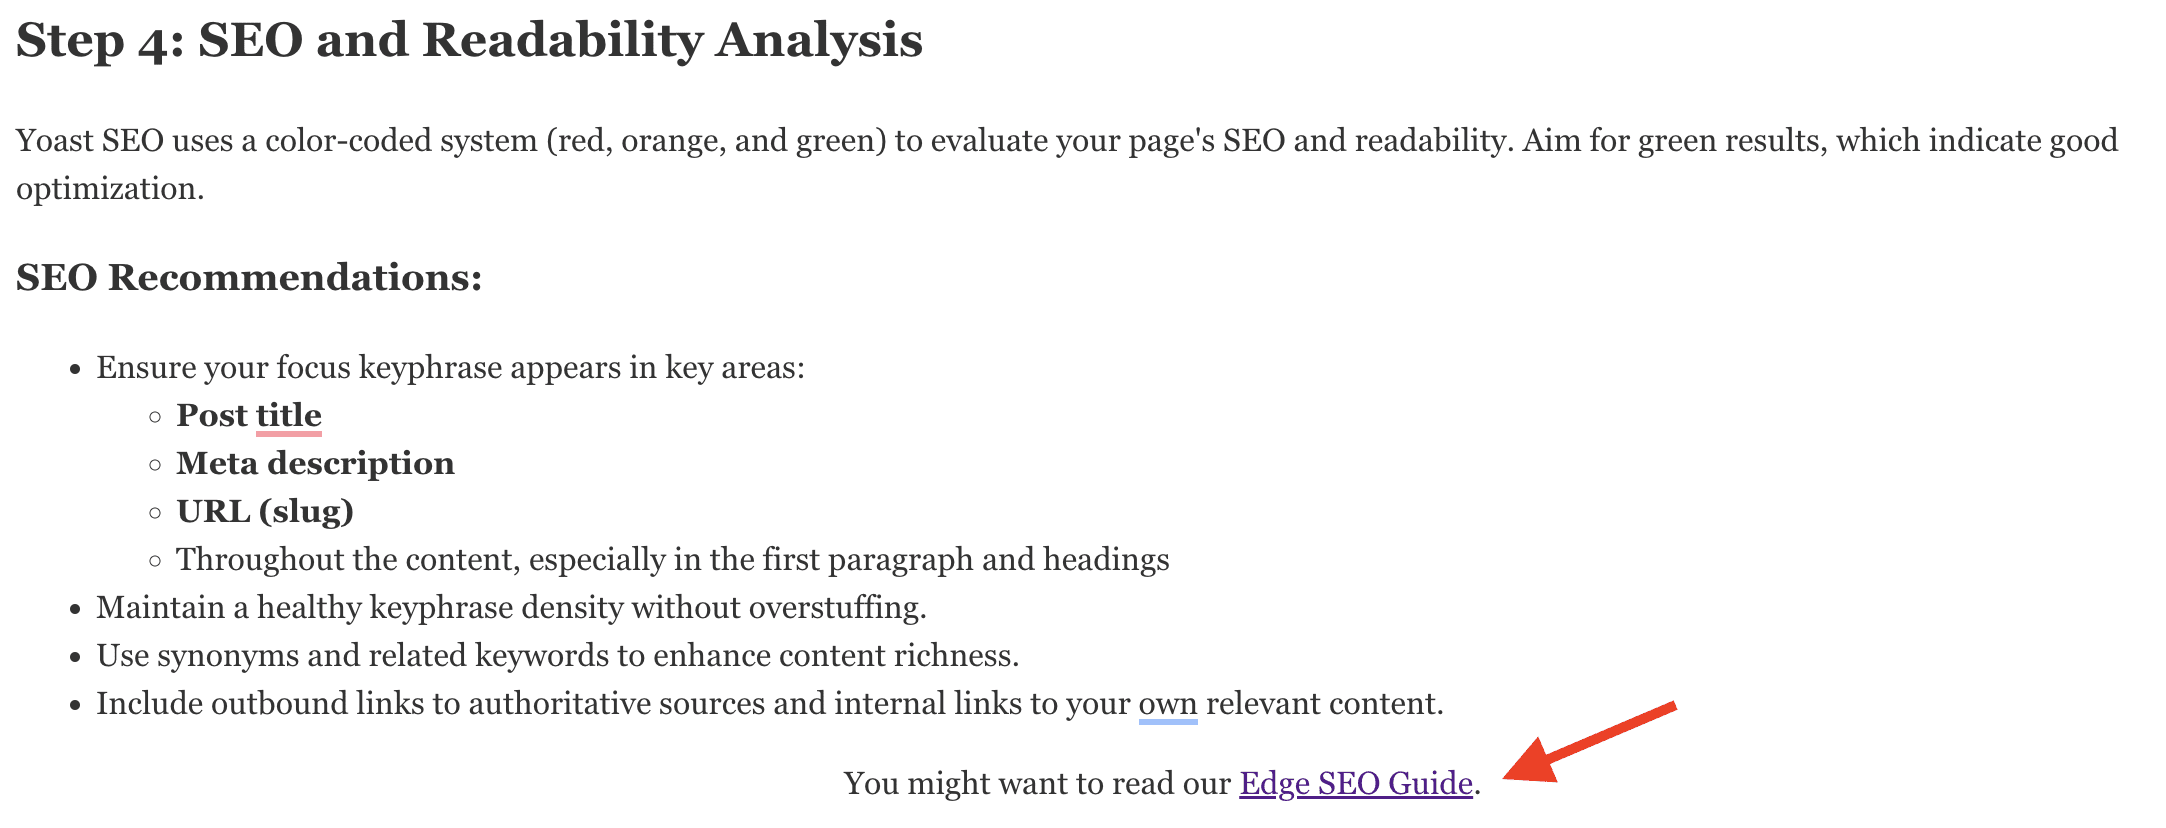
- Include outbound links to authoritative sources and internal links to your own relevant content.
You might want to read our Edge SEO Guide.
Readability Recommendations:
- Write short, concise paragraphs.
- Break up content with subheadings (H2, H3, etc.).
- Use transition words to improve flow.
- Minimize the use of passive voice.
- Vary sentence length to enhance readability.
Step 5: Crafting Meta Descriptions and Slugs
The meta description is a brief summary that appears in search engine results. An enticing meta description can improve click-through rates.
- Meta Description:
- Summarize your content in 150-160 characters.
- Include your focus keyphrase.
- Make it compelling to encourage users to click.
- Slug (URL):
- Should be short and include your focus keyphrase.
- Use hyphens to separate words (e.g., optimize-wordpress-yoast-seo).
Step 6: Add Internal and External Links
Linking is a critical component of SEO:
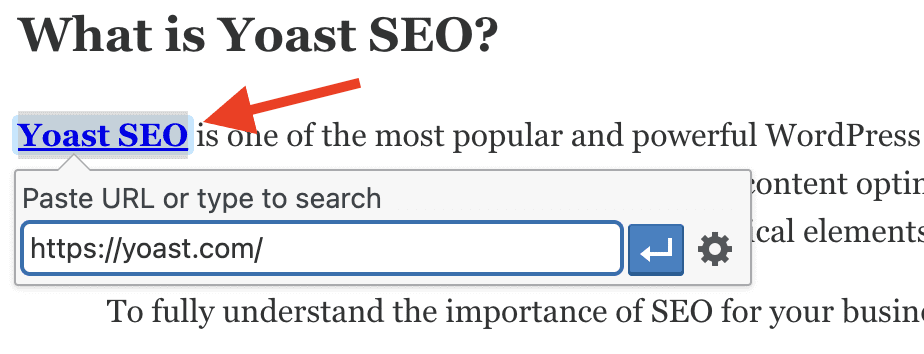
Internal Links:
- Help users navigate your site and discover more content.
- Pass link equity between pages, improving SEO.
- Consider linking to related posts.
Read our guide on How to Develop a Multilingual WordPress Site for Global Businesses.
External Links:
- Link to authoritative sources to add credibility.
- Make sure external links open in a new tab to keep users on your site.
Step 7: Utilize Schema Markup
Schema markup helps search engines understand your content better, leading to richer search results (like rich snippets).
- Navigate to the Schema tab in the Yoast SEO meta box.
- Choose the appropriate schema type for your content, such as Article, WebPage, or Product.
- For blog posts, Article is usually appropriate.

Check out our Ultimate Guide to Edge SEO.
Unfortunately, the Free version of Yoast SEO does not allow us to create a custom Schema Markup but only select from predefined ones. For this, I use a different plugin called Structured Data which adds Google Rich snippets markup according to Schema.org guidelines.

{
"@context": "https://schema.org",
"@type": "BlogPosting",
"headline": "Optimize Your WordPress Site with Yoast SEO: Beginner's Guide",
"image": "https://example.com/path-to-featured-image.jpg",
"author": {
"@type": "Person",
"name": "Christian Nzouat"
},
"publisher": {
"@type": "Organization",
"name": "Nzouat",
"logo": {
"@type": "ImageObject",
"url": "https://example.com/path-to-logo.jpg"
}
},
"datePublished": "2024-10-22",
"dateModified": "2024-10-22",
"description": "Learn how to optimize your WordPress site with Yoast SEO, the leading SEO plugin. Follow this step-by-step guide for improved search rankings and website performance.",
"mainEntityOfPage": {
"@type": "WebPage",
"@id": "https://nzouat.com/optimize-wordpress-with-yoast-seo"
},
"articleSection": "SEO, WordPress, Yoast SEO",
"keywords": "Yoast SEO, WordPress SEO, optimize WordPress site, SEO tutorial, beginner SEO guide, SEO plugin for WordPress, search engine optimization",
"wordCount": "1000",
"inLanguage": "en-US",
"potentialAction": {
"@type": "SearchAction",
"target": "https://nzouat.com/search?query={search_term_string}",
"query-input": "required name=search_term_string"
}
}
Step 8: Generate and Submit an XML Sitemap
An XML sitemap lists all the pages on your website, helping search engines crawl and index your content effectively.
- Yoast SEO automatically creates an XML sitemap at yourwebsite.com/sitemap_index.xml.
- To enable your sitemap:
- Go to Yoast SEO > General > Site Features > API > XML sitemaps.
- Adjust settings under XML sitemaps and make sure it is enabled.
- To verify that the sitemap is active, visit yourwebsite.com/sitemap_index.xml. It should look something like this

- Submit your sitemap to Google Search Console:
- Log in to Google Search Console.
- Select your website property.
- Navigate to Sitemaps in the left-hand menu.
- Enter sitemap_index.xml in the Add a new sitemap field and click Submit.

Step 9: Optimize Advanced Settings
For users who want to delve deeper into SEO optimization:
Breadcrumbs:
- Enable breadcrumbs in Yoast SEO under Yoast SEO > Settings > Advanced > Breadcrumbs.
- Breadcrumbs enhance the navigation and can improve SEO.
Social Sharing From a Post/Page
- Configure social settings under Yoast SEO > Social for a specific page or post.
- Add your social media title, description, and a featured image.

- Customize how your content appears when shared on platforms like Facebook and X (Twitter).
Read our article on A Social Media Marketing Plan for Your Business.
Step 10: Regularly Update and Monitor Your SEO
SEO is an ongoing process. Regularly update your content and monitor your site’s performance.
- Use tools like Google Analytics and Google Search Console to track traffic and rankings.
- Regularly check Yoast SEO’s analysis for your pages and posts.
 Stay updated with the latest SEO trends and algorithm changes.
Stay ahead with Mastering Sales Funnels in 2025.
Conclusion
Optimizing your WordPress site with Yoast SEO is a straightforward process that can significantly enhance your search engine visibility. By following this step-by-step guide, you’re well on your way to improving your site’s SEO, driving more organic traffic, and providing a better user experience.

 Stay updated with the latest SEO trends and algorithm changes.


